Getting Started
Overview
Teaching: min
Exercises: minQuestions
What is a command shell and why would I use one?
What programs will I be using in class?
How can I find the terminal and what is it?
Objectives
Access the CyVerse Discovery Environment, JupyterLab, and the terminal.
What is a shell and why should I care?
A shell is a computer program that presents a command line interface which allows you to control your computer using commands entered with a keyboard instead of controlling graphical user interfaces (GUIs) with a mouse/keyboard combination.
There are many reasons to learn about the shell:
- Many bioinformatics tools can only be used through a command line interface, or have extra capabilities in the command line version that are not available in the GUI. This is true, for example, of BLAST, which offers many advanced functions only accessible to users who know how to use a shell.
- The shell makes your work less boring. In bioinformatics you often need to do the same set of tasks with a large number of files. Learning the shell will allow you to automate those repetitive tasks and leave you free to do more exciting things.
- The shell makes your work less error-prone. When humans do the same thing a hundred different times (or even ten times), they’re likely to make a mistake. Your computer can do the same thing a thousand times with no mistakes.
- The shell makes your work more reproducible. When you carry out your work in the command-line (rather than a GUI), your computer keeps a record of every step that you’ve carried out, which you can use to re-do your work when you need to. It also gives you a way to communicate unambiguously what you’ve done, so that others can check your work or apply your process to new data.
- Many bioinformatic tasks require large amounts of computing power and can’t realistically be run on your own machine. These tasks are best performed using remote computers or cloud computing, which can only be accessed through a shell.
In this lesson you will learn how to gain access to the shell and tools we will be utilizing this semester.
How to access the shell
On a Mac or Linux machine, you can access a shell through a program called Terminal, which is already available on your computer. If you’re using Windows, you’ll need to download a separate program to access the shell or use Windows PowerShell. The problem with these methods are that they require you to access a remote server which often costs money paid by you, the institution, or a granting agency. Instead, this course has been developed using the CyVerse Discovery Environment which will allow us free access to a terminal and server. Functionally, each method works the same.
We will spend most of our time learning about the basics of the shell by manipulating some experimental data. Some of the data we’re going to be working with is quite large, and we’re also going to be using several bioinformatic packages in later lessons to work with this data. To avoid having to spend time downloading the data and downloading and installing all of the software, we’re going to be working with data on a remote server already stored for you in our Discovery Environment app.
First, you will need to create an account on CyVerse by clicking this link.
Each of you will have your own username and password. This will prevent us from accidentally changing each other’s files as we work through the exercises.
After logging in, you will see a screen showing three different services we can utilize.
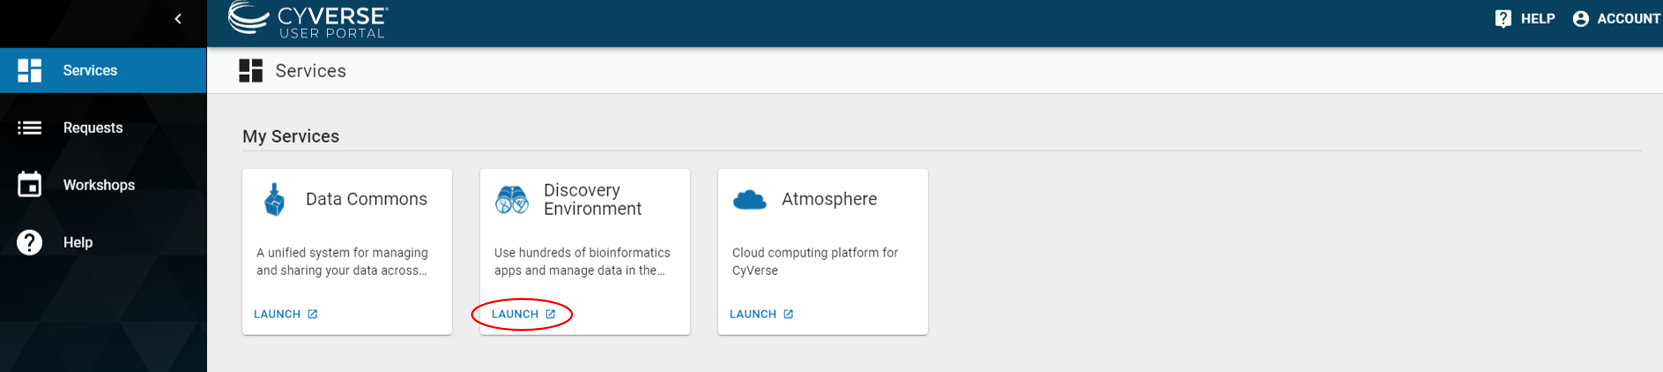
Click on LAUNCH for the Discovery Environment. This screen will ask you to login again utilizing the same information you just used to create your CyVerse account. Follow the onscreen prompts until you reach a screen that looks like this and then follow the directions in the image.
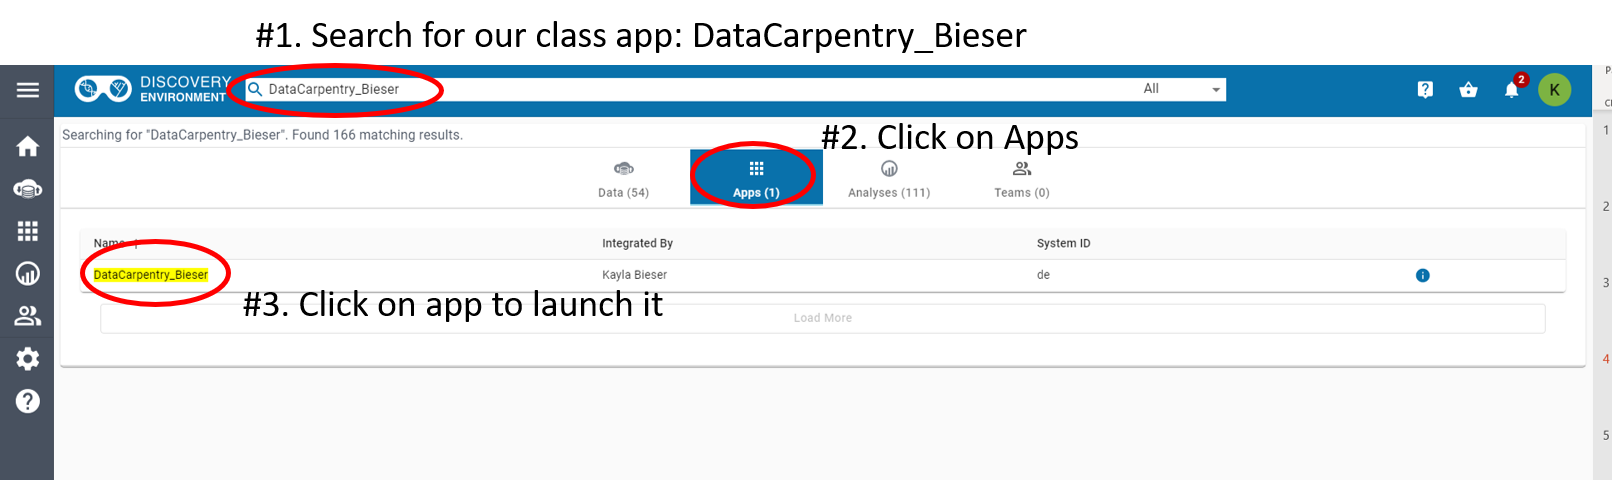
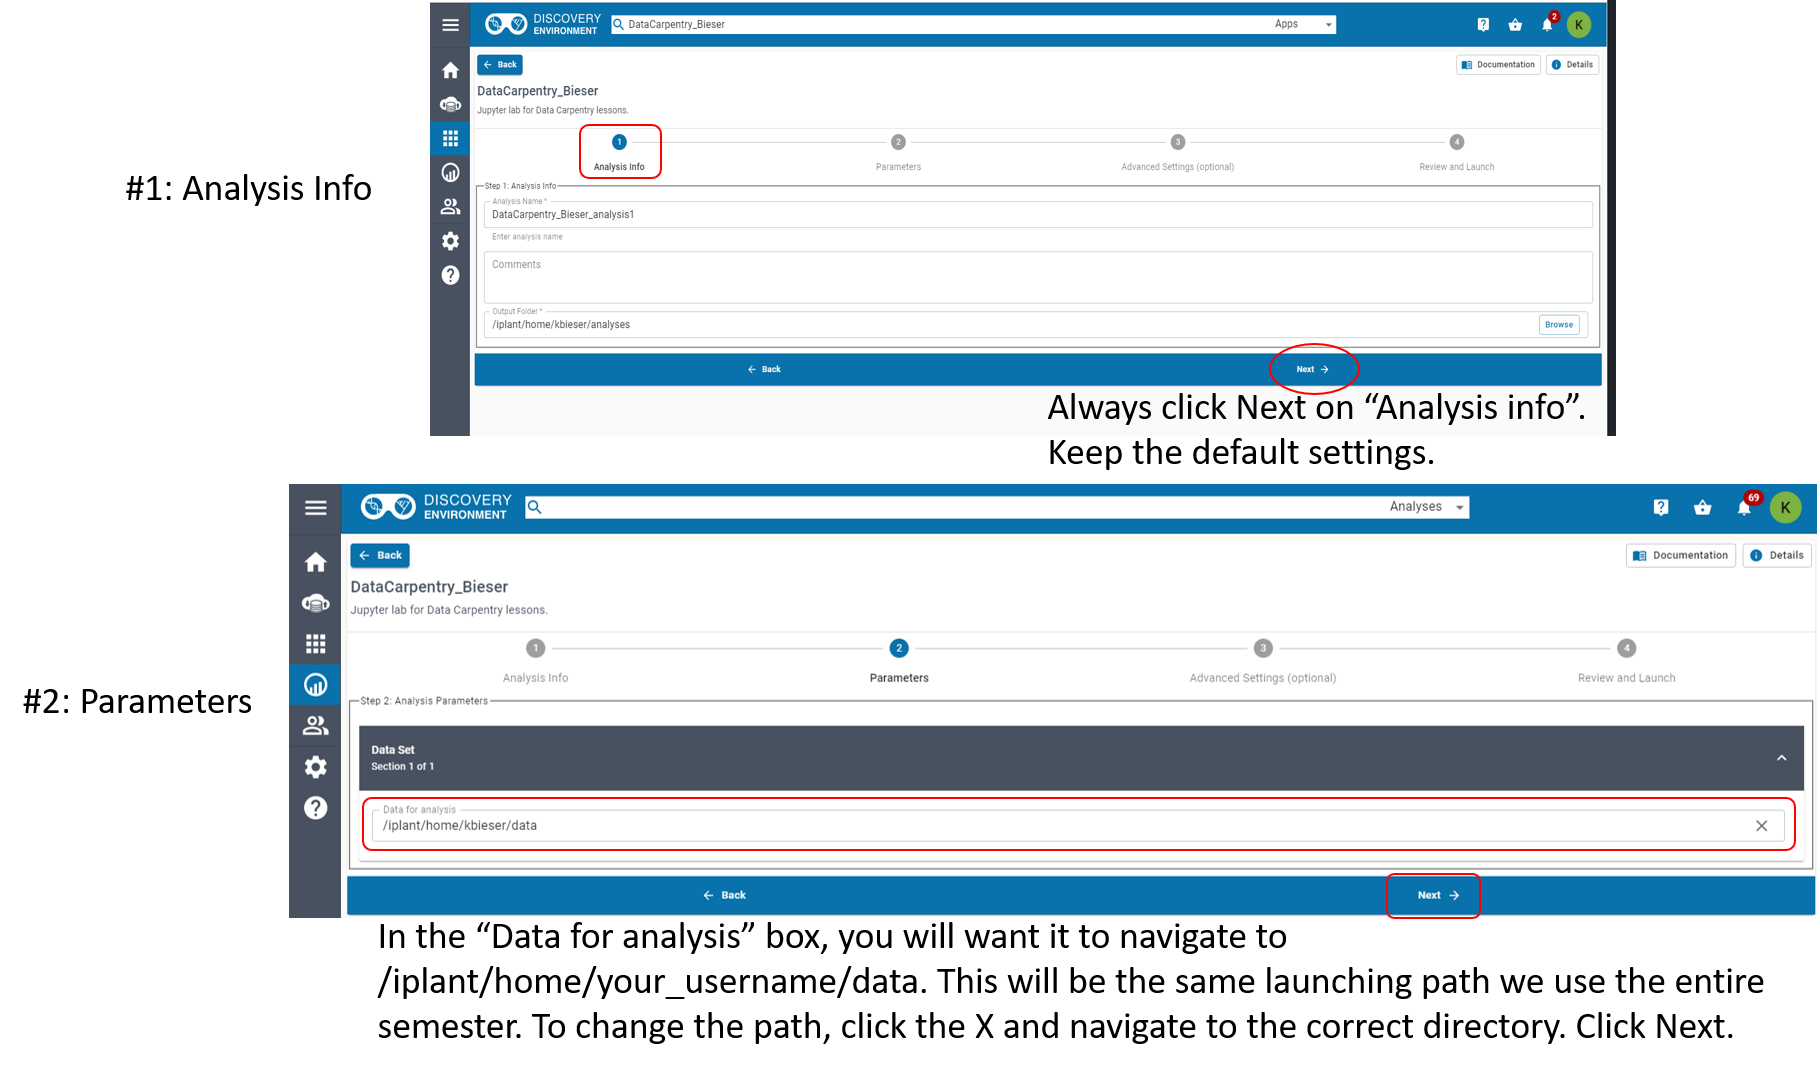
The next screen will walk you through 4 steps to launch the app. We will leave the default settings for everything the very first time you launch the app. Every subsequent time you will change the Parameters Data set as shown in the following screenshot step #2. Follow the series of images to launch the app. (You may return to these directions any time during the semester if you forget.)
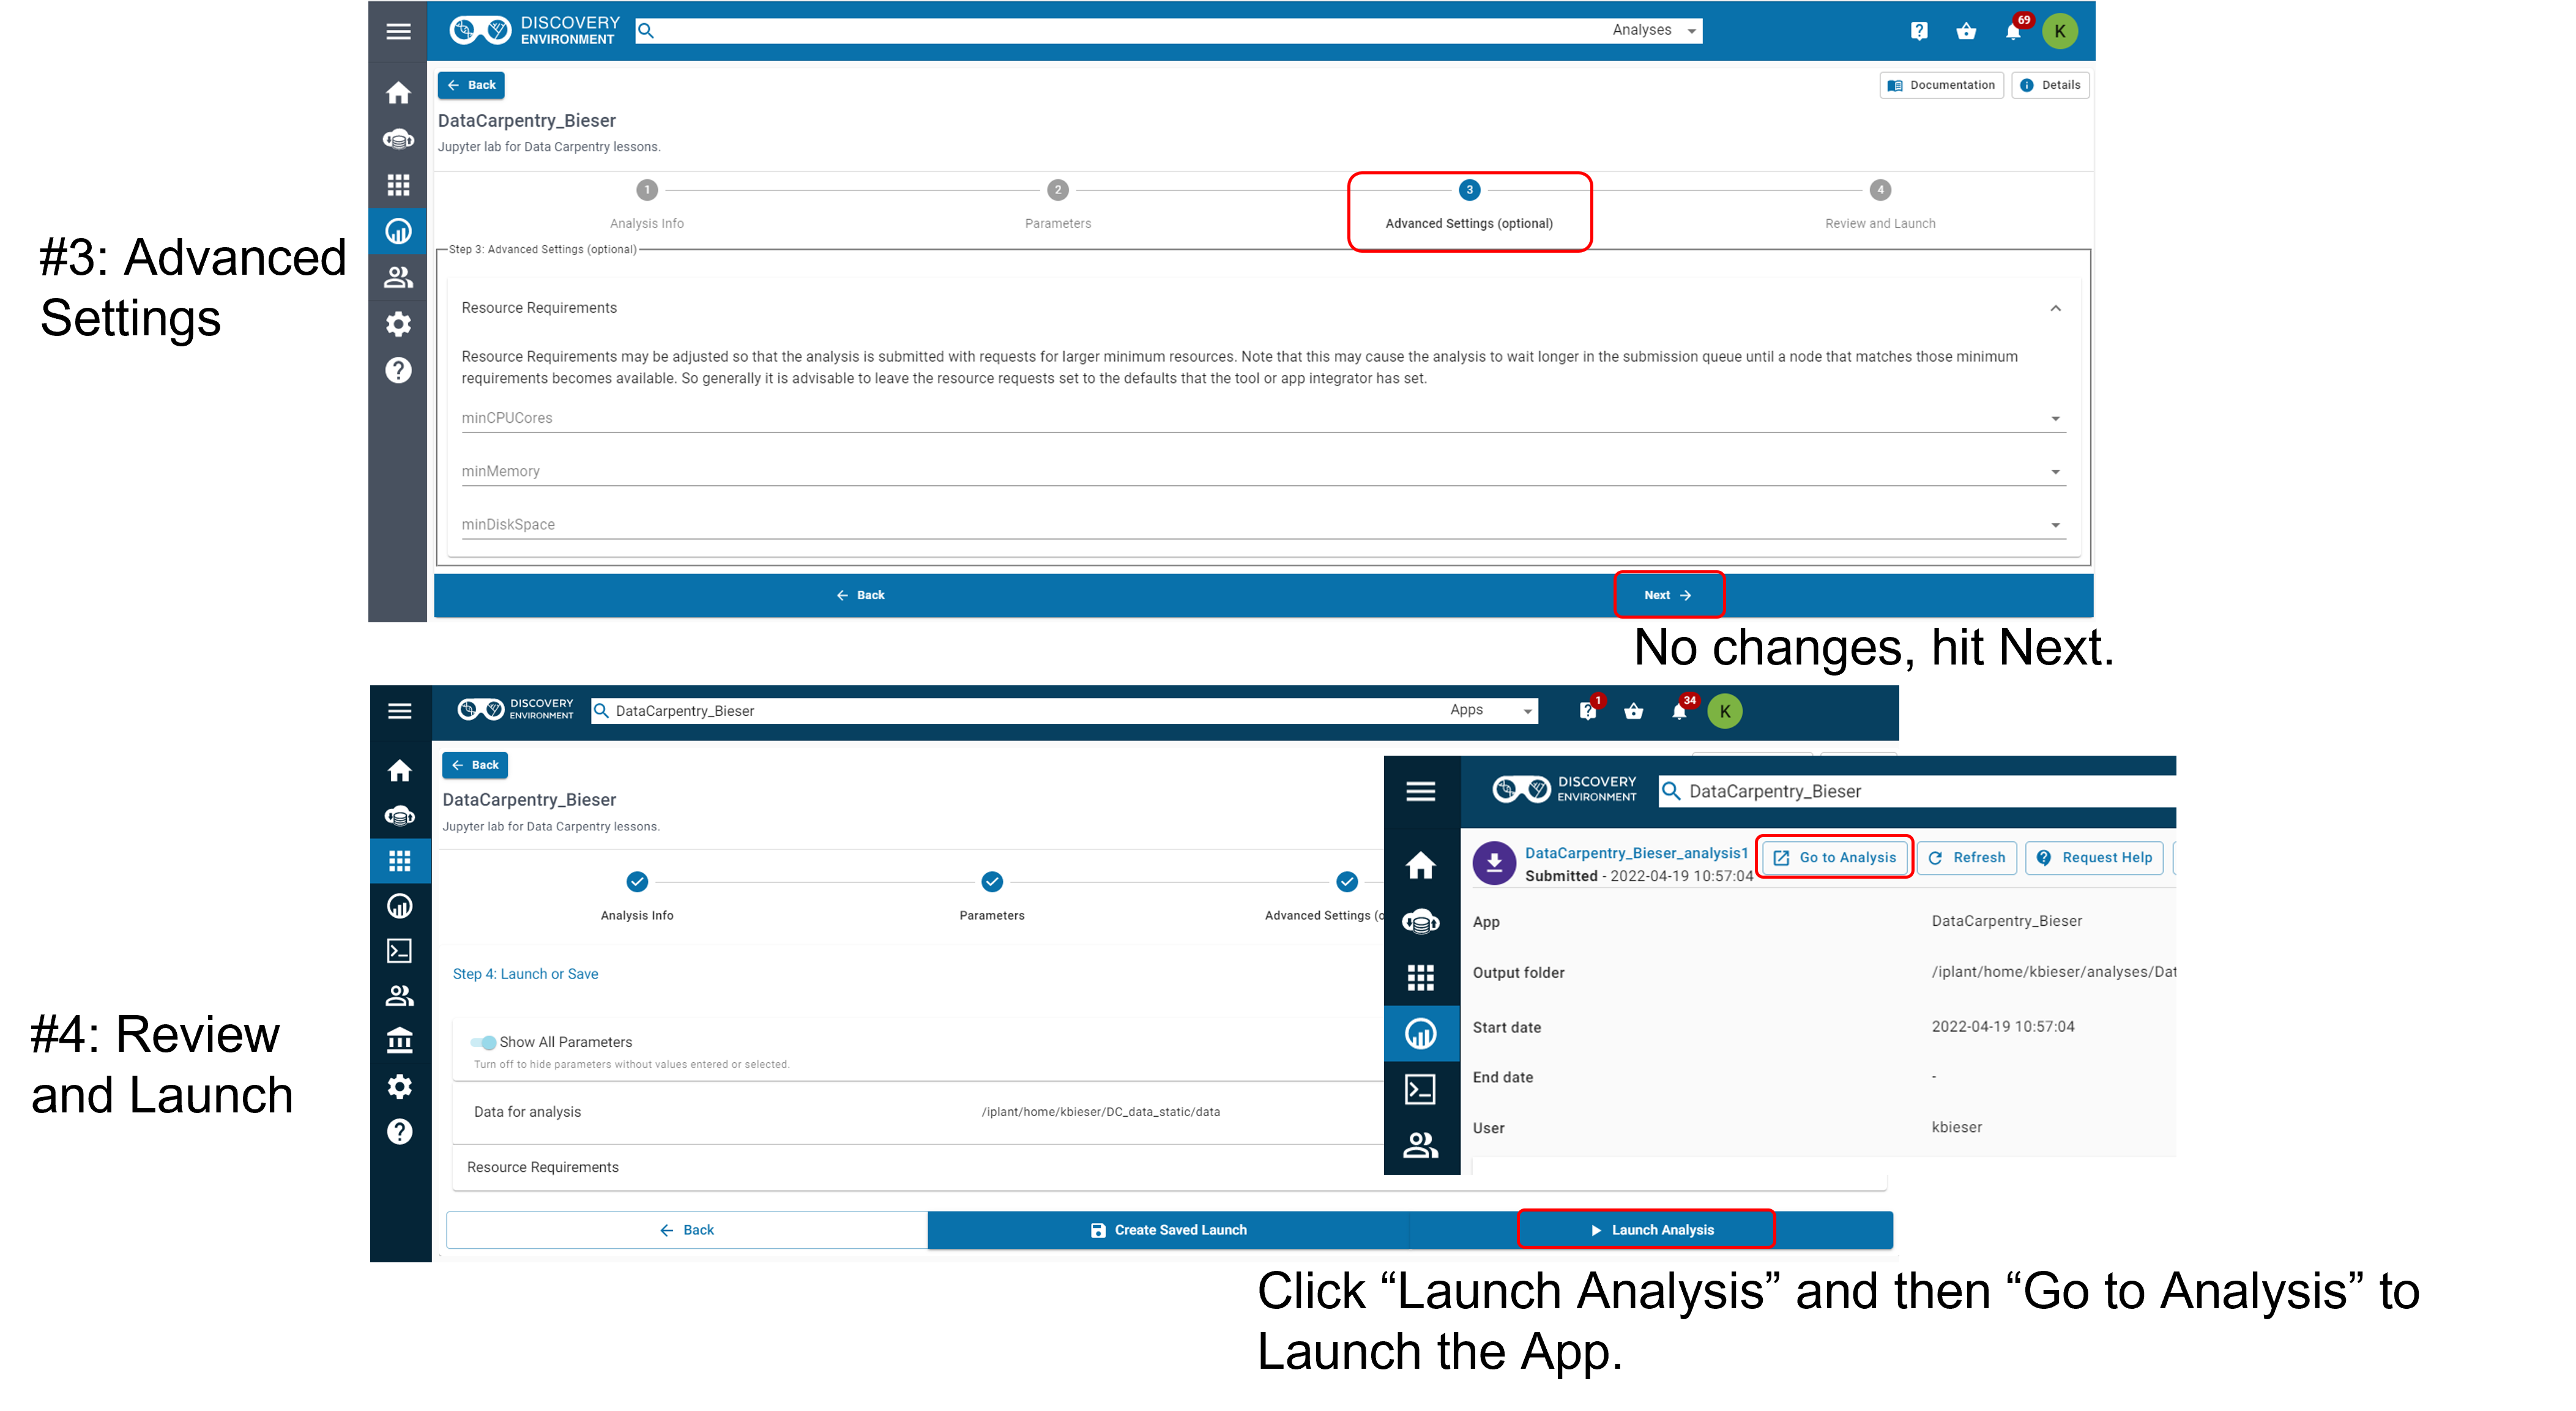
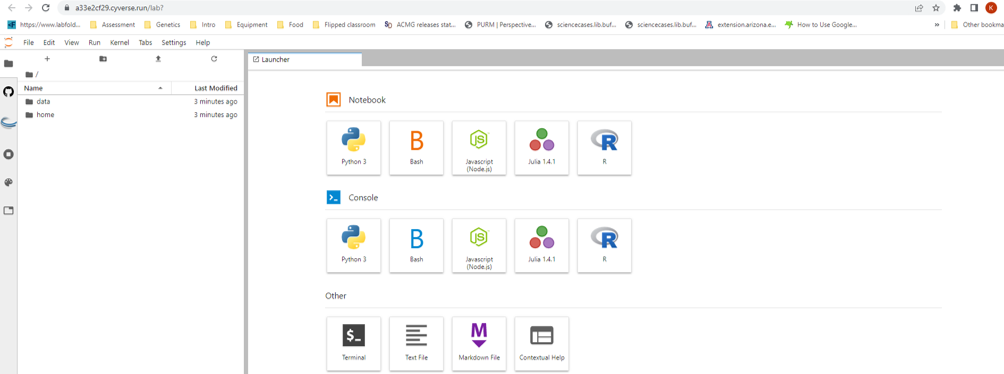
This next step will load a new tab called “JupyterLab” which is the app and data we will utilize. Be patient as it loads. When the app has loaded you should see this page which lets you know you have successfully launched the app.
How to transfer data to your username
The data is currently stored in kbieser, but we want to transfer the data to your username for all analyses. To do this, open the terminal.
Copy and paste the following command into the terminal. Hit enter.
$ cd data/input/
Copy and paste the following command into the terminal. Hit enter. Anytime you see “your_username”, you must replace this with your CyVerse account username.
$ cp data/ ~/home/your_username/
To verify the data transferred copy and paste the following commands. Hit enter after each command.
$ cd ~/home/your_username
$ ls
If the data transferred, you should now see a folder named “data”. ‘/home/gea_user/home/your_username/data’
Tip
You can leave the app running for 48 hours at which point it will automatically be terminated. If you are ever uncertain if your data is saving, return to the Discovery Environment and check your data folder (The cloud icon on the left panel). Anything new that you did that day and saved should appear there. There won’t be anything we need to save until later in our lessons, but this is a good habit to get into to right away.
Key Points
The shell gives you the ability to work more efficiently by using keyboard commands rather than a GUI.
Everything you need to utilize in class is housed in our JupyterLab app.
Login in to CyVerse and launch our class app everyday before class.